1.MQ引言 1.1什么是MQ MQ全称为Message Queue, 消息队列(MQ)是一种应用程序对应用程序的通信方法。消息队列可以简单理解为:把要传输的数据放在队列中,mq 就是存放和发送消息的这么一个队列中间件。在消息队列中,把数据放到消息队列的角色叫做 生产者,从消息队列中消费获取数据的叫做 消费者。
MQ和JMS类似,但不同的是JMS是SUN Java消息中间件服务的一个标准和API定义,而MQ则是遵循了AMQP协议的具体实现和产品
1.2常见MQ 较为成熟的MQ产品有IBM WebSphere MQ、RabbitMQ 、ZeroMQ 、ActiveMQ、Redis(当做一个轻量级的队列服务来使用)、Kafka、RocketMQ
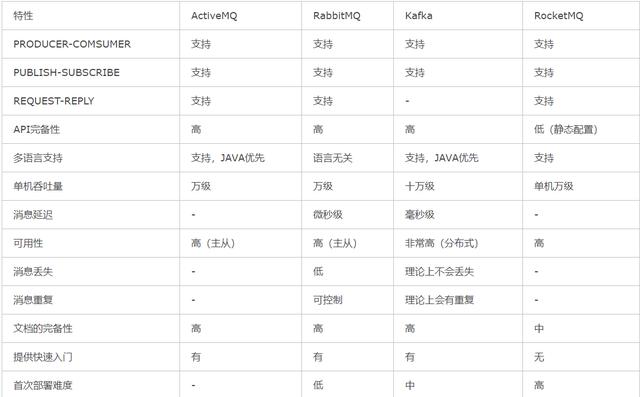
1.3不同MQ特点 1 2 3 4 5 6 7 8 9 10 11 12 13 # 1.ActiveMQ ActiveMQ是Apache出品,最流行的,能力强劲的开源消息总线。它是一个完全支持JMS规范的的消息中间件。丰富的API, 多种集群架构模式让ActiveMQ在业界成为老牌的消息中间件,在中小型企业颇受欢迎! # 2.Kafka Kafka是LinkedIn开源的分布式发布-订阅消息系统,目前归属于Apache顶级项目。Kafka主要特点是基于Pu11的模式来处理消息消费,追求高吞吐量,一开始的目的就是用于日志收集和传输。0. 8版本开始支持复制,不支持事务, 对消息的重复、丢失、错误没有严格要求,适合产生大量数据的互联网服务的数据收集业务。 # 3.RocketMQ RocketMQ是阿里开源的消息中间件,它是纯Java开发, 具有高吞吐量、高可用性、适合大规模分布式系统应用的特点。RocketMQ思路起源于Kafka,但并不是Kafka的一个Copy,它对消息的可靠传输及事务性做了优化,目前在阿里集团被广泛应用于交易、充值、流计算、消息推送、日志流式处理、binglog分发等场景。 # 4.RabbitMQ RabbitMQ是使用Erlang语言开发的开源消息队列系统,基于AMQP协议来实现。AMQP的主要特征是面向消息、队列、路由(包括点对点和发布/订阅)、 可靠性、安全。AMQP协议更多用在企业系统内对数据一致性、稳定性和可靠性要求很高的场景,对性能和吞吐量的要求还在其次。 RabbitMQ比Kafka可靠,Kafka更适合IO高吞吐的处理,一般应用在大数据日志处理或对实时性(少量延迟),可靠性(少量丢数据)要求稍低的场景使用,比如ELK日志收集。
2.RabbitMQ引言
RabbitMQ轻巧,易于在内部和云中部署。它支持多种消息传递协议。RabbitMQ可以部署在分布式和联合配置中,以满足大规模,高可用性的要求
2.2RabbitMQ安装 rabbitmq和erlang要对应
1 2 3 4 5 6 7 8 9 10 11 12 13 14 15 16 17 18 19 20 21 22 23 24 25 26 27 28 29 rabbitmq-server-3.7.28-1.el7.noarch.rpm erlang-22.3.4.10-1.el7.x86_64.rpm [root@localhost custom] warning: erlang-22.3.4.10-1.el7.x86_64.rpm: Header V4 RSA/SHA1 Signature, key ID 6026dfca: NOKEY Preparing... Updating / installing... 1:erlang-22.3.4.10-1.el7 [root@localhost custom] warning: rabbitmq-server-3.7.28-1.el7.noarch.rpm: Header V4 RSA/SHA256 Signature, key ID 6026dfca: NOKEY error: Failed dependencies: socat is needed by rabbitmq-server-3.7.28-1.el7.noarch [root@localhost custom] warning: rabbitmq-server-3.7.28-1.el7.noarch.rpm: Header V4 RSA/SHA256 Signature, key ID 6026dfca: NOKEY Preparing... Updating / installing... 1:rabbitmq-server-3.7.28-1.el7 [root@localhost custom] [root@localhost custom]
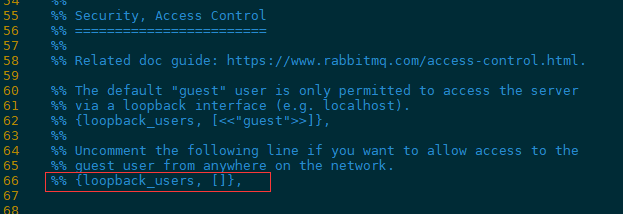
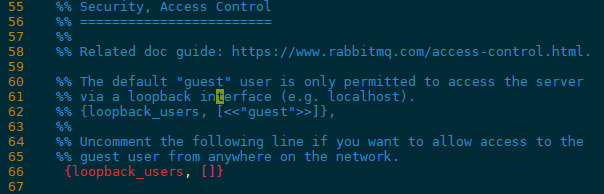
去掉%%以及最后的,
1 2 [root@localhost custom]
1 2 3 4 5 6 7 8 systemctl start|restart|stop|status rabbitmq-server systemctl enable rabbitmq-server rabbitmqctl help rabbitmq-pkugins enable |list|disable
启动服务时一直卡主,但是服务却能够使用,查看状态时也不正常
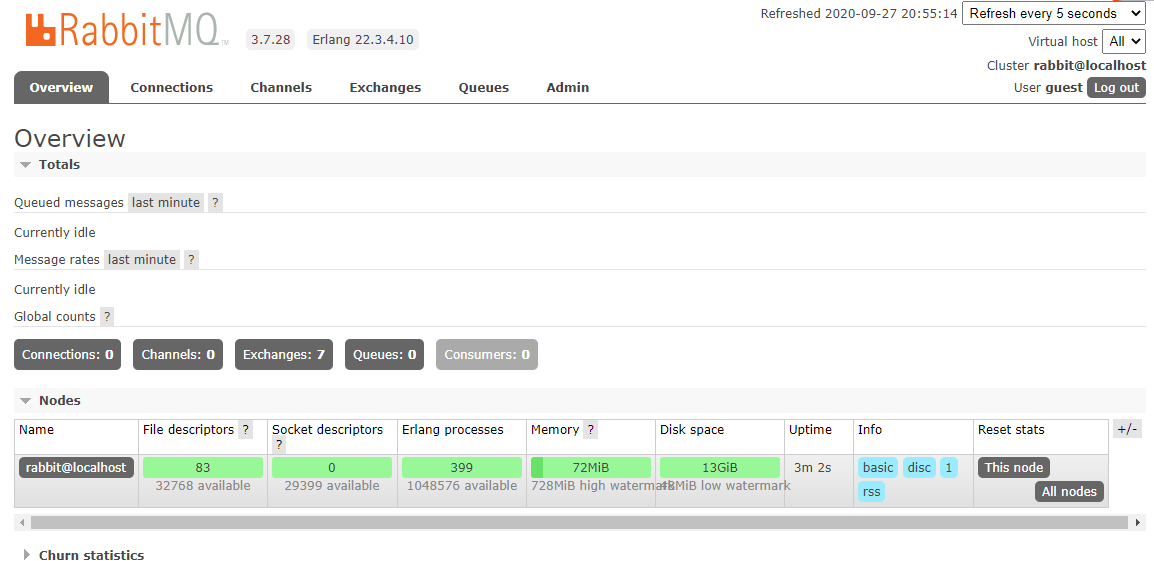
3.RabbitMQ配置 3.1开启web管理页面 1 2 3 4 5 6 7 8 9 10 11 12 13 14 15 16 17 18 19 20 21 [root@localhost custom] Enabling plugins on node rabbit@localhost: rabbitmq_management The following plugins have been configured: rabbitmq_management rabbitmq_management_agent rabbitmq_web_dispatch Applying plugin configuration to rabbit@localhost... The following plugins have been enabled: rabbitmq_management rabbitmq_management_agent rabbitmq_web_dispatch set 3 plugins.Offline change; changes will take effect at broker restart. http://192.168.45.121:15672 guest guest
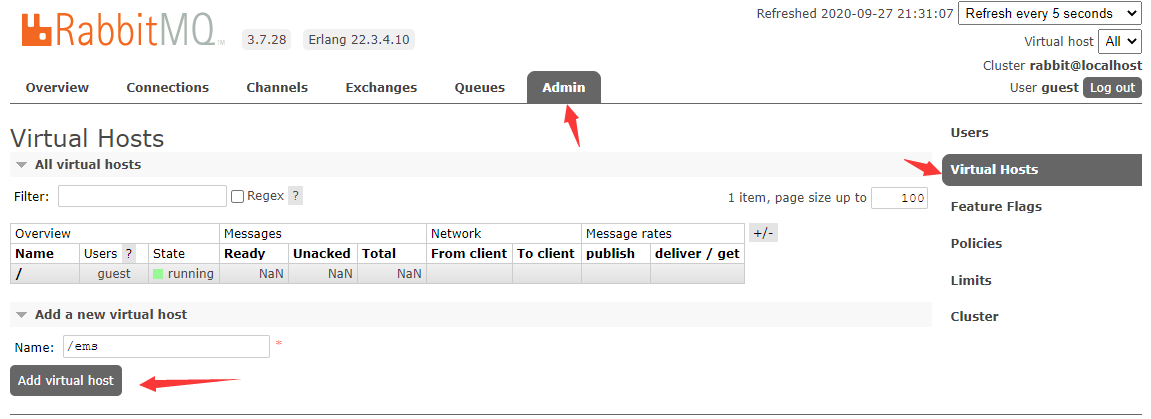
3.2添加Virtual Hosts
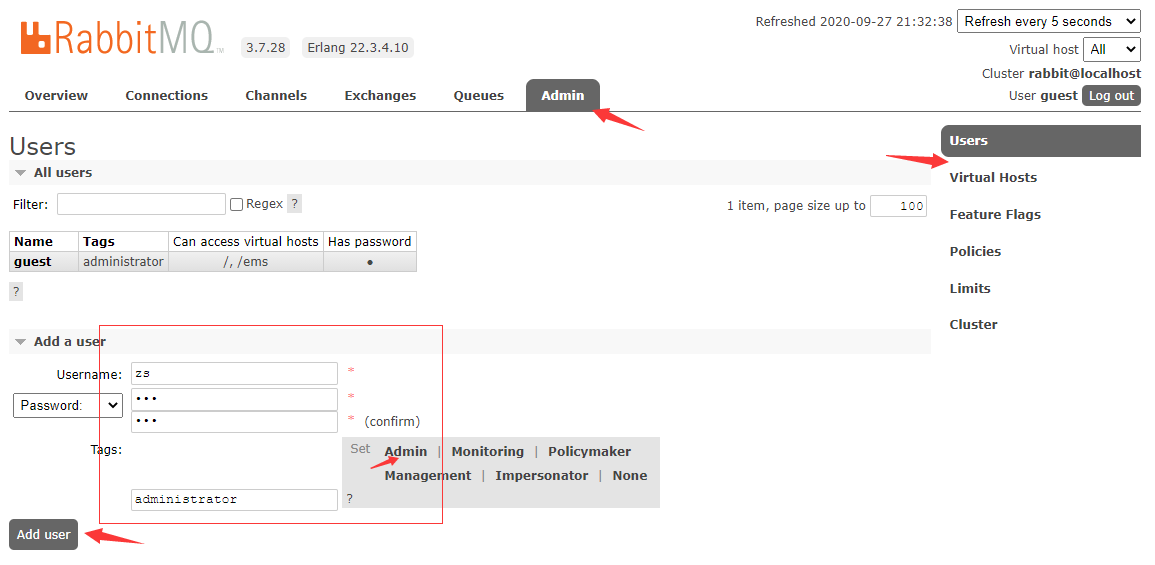
3.3添加Users
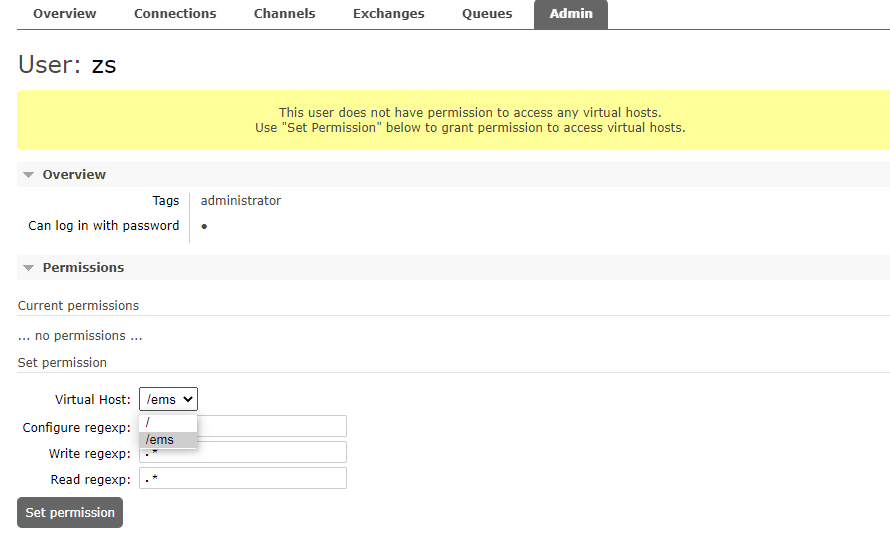
3.4设置Permission
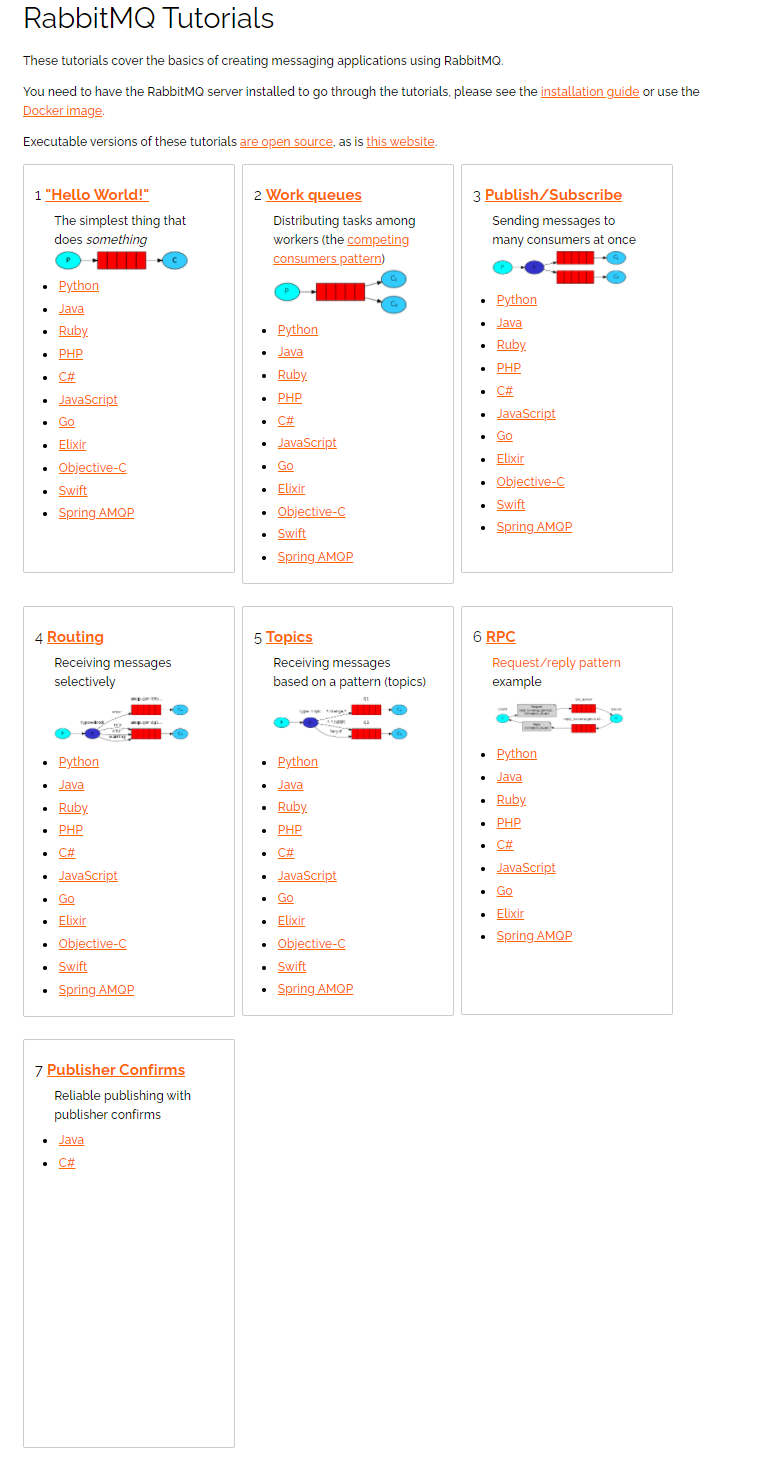
4.RabbitMQ快速上手 4.1RabbitMQ支持的消息模型
4.2引入依赖 1 2 3 4 5 <dependency > <groupId > com.rabbitmq</groupId > <artifactId > amqp-client</artifactId > <version > 5.8.0</version > </dependency >
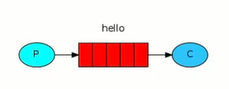
4.3第一种模型(直连)
图解:
P:生产者,发送消息的程序
C:消费者:消息的接受者,会一直等待消息的到来
queue:消息队列,红色部分,缓存消息;生产者生产消息,消费者消费消息
4.3.1生产者 1 2 3 4 5 6 7 8 9 10 11 12 13 14 15 16 17 18 19 20 21 22 23 24 25 26 27 28 29 30 31 32 33 34 35 36 37 38 39 40 41 42 43 44 45 46 47 48 49 50 51 52 53 54 55 package cn.this52.helloworld.provide;import com.rabbitmq.client.Channel;import com.rabbitmq.client.Connection;import com.rabbitmq.client.ConnectionFactory;import org.junit.jupiter.api.Test;import java.io.IOException;import java.util.concurrent.TimeoutException;public class Provide @Test public void SendMessage () throws IOException, TimeoutException ConnectionFactory connectionFactory = new ConnectionFactory(); connectionFactory.setHost("192.168.45.121" ); connectionFactory.setPort(5672 ); connectionFactory.setVirtualHost("/ems" ); connectionFactory.setUsername("zs" ); connectionFactory.setPassword("123" ); Connection connection = connectionFactory.newConnection(); Channel channel = connection.createChannel(); channel.queueDeclare("hello" ,false ,false ,false ,null ); channel.basicPublish("" ,"hello" ,null ,"hello rabbitmq" .getBytes()); channel.close(); connection.close(); } }
4.3.2消费者 1 2 3 4 5 6 7 8 9 10 11 12 13 14 15 16 17 18 19 20 21 22 23 24 25 26 27 28 29 30 31 32 33 34 35 36 37 38 39 40 41 package cn.this52.helloworld;import com.rabbitmq.client.*;import java.io.IOException;import java.util.concurrent.TimeoutException;public class Consumer public static void main (String[] args) throws IOException, TimeoutException, InterruptedException ConnectionFactory connectionFactory = new ConnectionFactory(); connectionFactory.setHost("192.168.45.121" ); connectionFactory.setPort(5672 ); connectionFactory.setVirtualHost("/ems" ); connectionFactory.setUsername("zs" ); connectionFactory.setPassword("123" ); Connection connection = connectionFactory.newConnection(); Channel channel = connection.createChannel(); channel.queueDeclare("hello" , false , false , false , null ); DefaultConsumer consumer = new DefaultConsumer(channel) { @Override public void handleDelivery (String consumerTag, Envelope envelope, AMQP.BasicProperties properties, byte [] body) throws IOException System.out.println("body = " + new String(body)); } }; channel.basicConsume("hello" , true , consumer); } }
注意:
单元测试环境中不支持多线程,无法测试消费
4.3.3API细节 1 2 3 4 5 6 7 8 9 10 11 12 13 14 15 16 17 18 19 20 channel.queueDeclare("hello" ,true ,false ,false ,null ); channel.basicPublish("" ,"hello" , MessageProperties.PERSISTENT_TEXT_PLAIN,"hello rabbitmq" .getBytes());
生产者和消费者通道参数要一致!
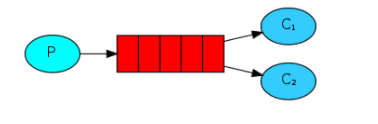
4.4第二种模型(work queue) Work Queues也被称为Task queus,任务模型,当消息处理比较耗时的时候,可能生产消息的速度会远远大于消息的消费速度,长时间的话消息会堆积的越来越多,无法及时处理,此时可以用work模型:让多个消费者绑定到一个队列,共同消费队列中的消息 。队列中的消息一旦被消费就会消失,不会重复消费。
图解:
P:生产者:任务发布者
C1:消费者1,消费任务
C2:消费者2,消费任务
4.4.1生产者 1 2 3 4 5 6 7 8 9 10 11 12 13 14 15 16 17 18 19 20 21 22 package cn.this52.helloworld.work;import cn.this52.RabbitMQUtils;import com.rabbitmq.client.Channel;import com.rabbitmq.client.Connection;import com.rabbitmq.client.MessageProperties;import java.io.IOException;public class Provider public static void main (String[] args) throws IOException Connection connection = RabbitMQUtils.getConnection(); Channel channel = connection.createChannel(); channel.queueDeclare("work" , true , false , false , null ); for (int i = 0 ; i < 10 ; i++) { channel.basicPublish("" , "work" , MessageProperties.PERSISTENT_TEXT_PLAIN, ("hello work queues" +i).getBytes()); } RabbitMQUtils.close(connection, channel); } }
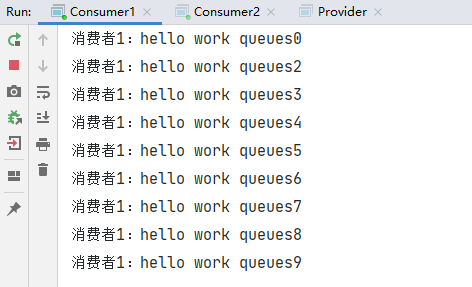
4.4.2消费者1 1 2 3 4 5 6 7 8 9 10 11 12 13 14 15 16 17 18 19 20 21 22 package cn.this52.helloworld.work;import cn.this52.RabbitMQUtils;import com.rabbitmq.client.*;import java.io.IOException;public class Consumer1 public static void main (String[] args) throws IOException Connection connection = RabbitMQUtils.getConnection(); Channel channel = connection.createChannel(); channel.queueDeclare("work" , true , false , false , null ); channel.basicConsume("work" , true , new DefaultConsumer(channel) { @Override public void handleDelivery (String consumerTag, Envelope envelope, AMQP.BasicProperties properties, byte [] body) throws IOException System.out.println("消费者1:" +new String(body)); } }); } }
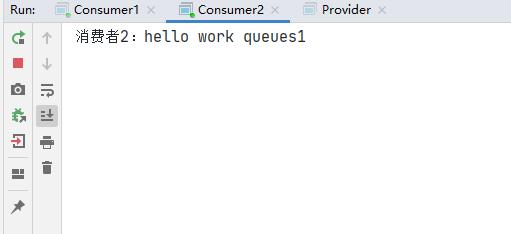
4.4.3消费者2 1 2 3 4 5 6 7 8 9 10 11 12 13 14 15 16 17 18 19 20 21 22 package cn.this52.helloworld.work;import cn.this52.RabbitMQUtils;import com.rabbitmq.client.*;import java.io.IOException;public class Consumer2 public static void main (String[] args) throws IOException Connection connection = RabbitMQUtils.getConnection(); Channel channel = connection.createChannel(); channel.queueDeclare("work" , true , false , false , null ); channel.basicConsume("work" , true , new DefaultConsumer(channel) { @Override public void handleDelivery (String consumerTag, Envelope envelope, AMQP.BasicProperties properties, byte [] body) throws IOException System.out.println("消费者2:" +new String(body)); } }); } }
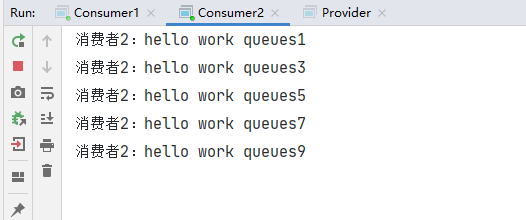
4.4.4测试
默认情况下,RabbitMQ将按顺序将每个消息发送给下一个使用者。平均而言,每个消费者都会收到相同数量的消息。这种分发消息的方式称为循环
4.4.5消息确认机制
自动确认消息可能会造成消息丢失,所以需要
1 2 3 4 5 6 7 8 9 10 11 12 13 channel.basicQos(1 ); channel.basicConsume("work" , false , new DefaultConsumer(channel) { @SneakyThrows @Override public void handleDelivery (String consumerTag, Envelope envelope, AMQP.BasicProperties properties, byte [] body) throws IOException Thread.sleep(2000 ); System.out.println("消费者2:" + new String(body)); channel.basicAck(envelope.getDeliveryTag(),false ); } });
设置通道一次消费一条消息 关闭消息消费自动确认,开启手动确认
4.5第三种模型(发布订阅->fanout) 广播
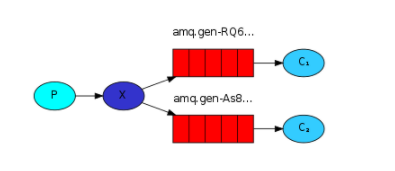
在广播模式下,消息发送流程:
4.5.1生产者 1 2 3 4 5 6 7 8 9 10 11 12 13 14 15 16 17 18 19 20 21 package cn.this52.helloworld.fanout;import cn.this52.RabbitMQUtils;import com.rabbitmq.client.Channel;import com.rabbitmq.client.Connection;import java.io.IOException;public class Provider public static void main (String[] args) throws IOException Connection connection = RabbitMQUtils.getConnection(); Channel channel = connection.createChannel(); channel.exchangeDeclare("order" , "fanout" ); channel.basicPublish("order" ,"" ,null ,"fanout type message" .getBytes()); RabbitMQUtils.close(connection,channel); } }
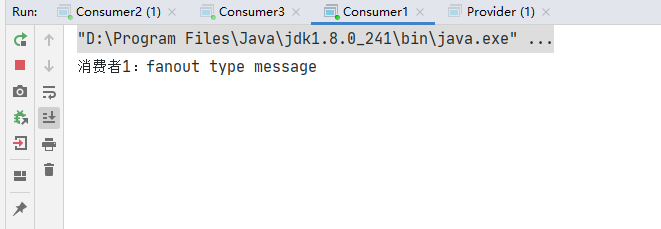
4.5.2消费者(3) 1 2 3 4 5 6 7 8 9 10 11 12 13 14 15 16 17 18 19 20 21 22 23 24 25 26 package cn.this52.helloworld.fanout;import cn.this52.RabbitMQUtils;import com.rabbitmq.client.*;import java.io.IOException;public class Consumer1 public static void main (String[] args) throws IOException Connection connection = RabbitMQUtils.getConnection(); Channel channel = connection.createChannel(); channel.exchangeDeclare("order" , "fanout" ); String queue = channel.queueDeclare().getQueue(); channel.queueBind(queue, "order" , "" ); channel.basicConsume(queue, true , new DefaultConsumer(channel) { @Override public void handleDelivery (String consumerTag, Envelope envelope, AMQP.BasicProperties properties, byte [] body) System.out.println("消费者1:" +new String(body)); } }); } }
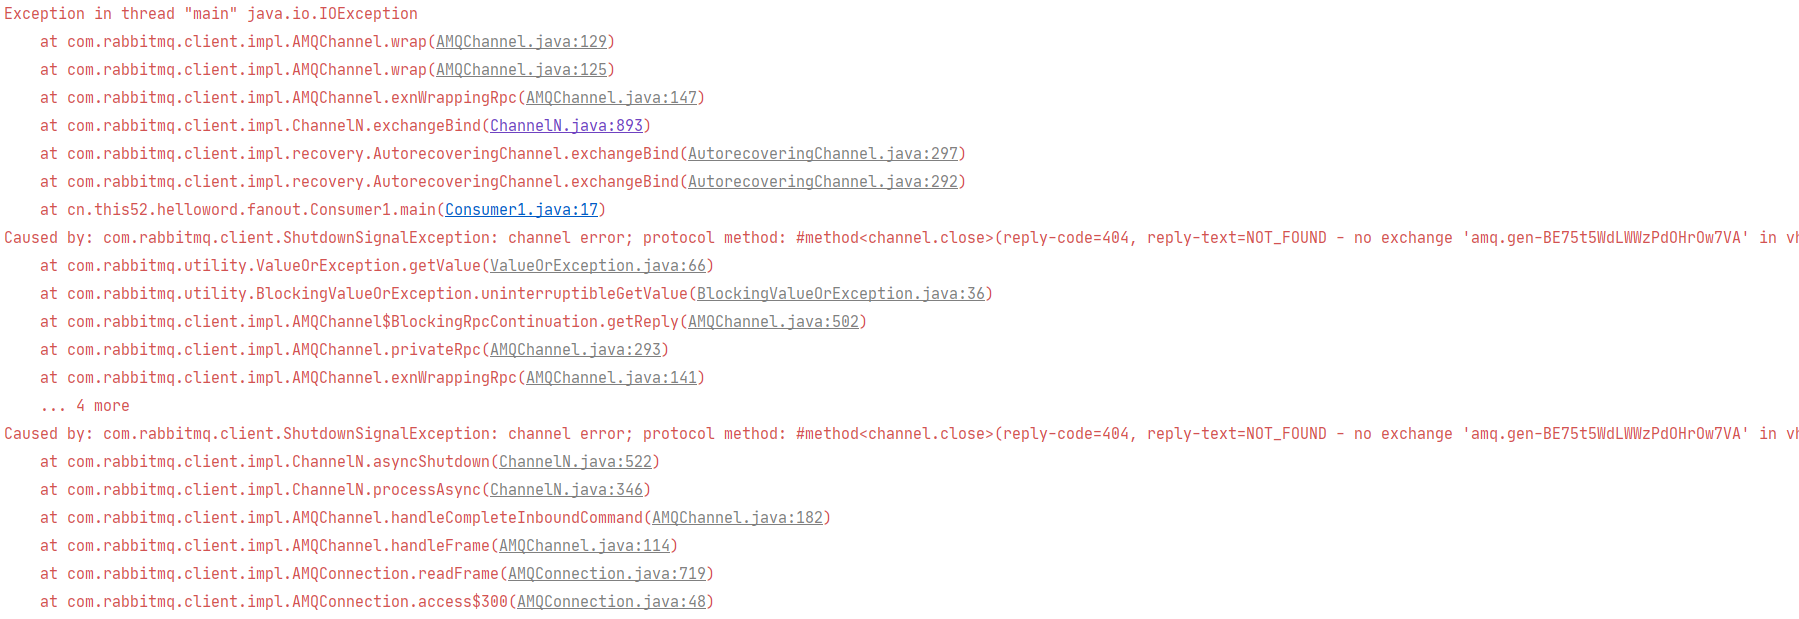
遇到一个错误
17行是channel.queueBind不是channel.exchangeBind
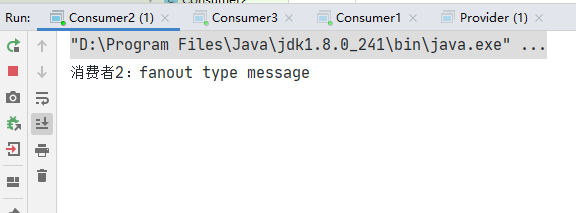
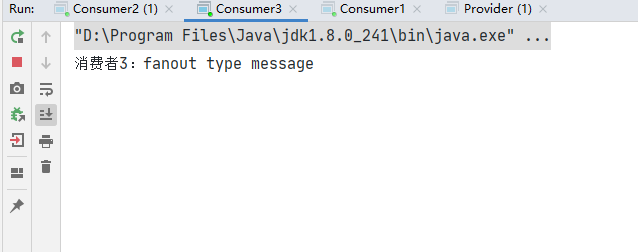
4.5.3测试结果
绑定交换机的队列都会收到消息,消费者也都消费到了同样的消息
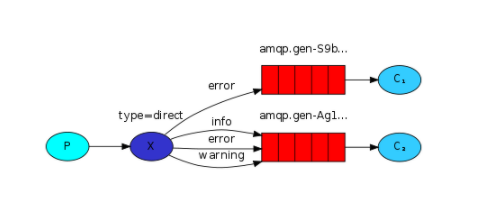
4.6第四种模型(Routing之订阅模型-Direct) 在fanout模式中,一条消息,会被所有订阅的队列都消费。但是某些情况下我们希望不同的消息被不同的队列所消费,这时候就要用到Direct类型的Exchange。
在Driect模型下:
队列和交换机的绑定,要指定一个RoutingKey
消息的生产者在向交换机发送消息时,必须指定RoutingKey
交换机不再把消息发给每一个绑定的队列,而是根据消息的RoutingKey进行判断,只有队列的RoutingKey与消息的的RoutingKey完全一致,才能接受到消息。
图解:
P:生产者,向交换机发送消息,并指定RoutingKey
X:交换机,接收生产者的消息,然后把消息递交给与RoutingKey匹配的队列
C1:消费者,其所在队列指定了需要RoutignKey为error的消息
C2:消费者,其所在队列指定了需要RoutignKey为info、error、warning的消息
4.6.1生产者 1 2 3 4 5 6 channel.exchangeDeclare("order_direct" , "direct" ); String routingKey="info" ; channel.basicPublish("order_direct" , routingKey, null , ("基于direct的消息->" +routingKey).getBytes());
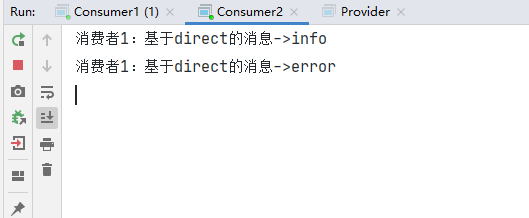
4.6.2消费者1 1 2 3 4 5 channel.exchangeDeclare("order_direct" ,"direct" ); String queue = channel.queueDeclare().getQueue(); channel.queueBind(queue,"order_direct" ,"error" );
4.6.3消费者2 1 2 3 4 5 6 7 channel.exchangeDeclare("order_direct" ,"direct" ); String queue = channel.queueDeclare().getQueue(); channel.queueBind(queue,"order_direct" ,"error" ); channel.queueBind(queue,"order_direct" ,"info" ); channel.queueBind(queue,"order_direct" ,"warning" );
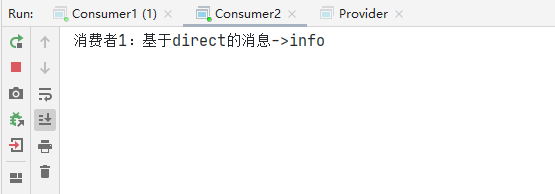
测试routingkey=info
消费者1未收到消息
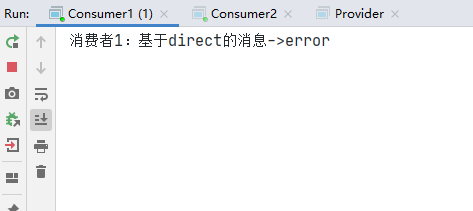
测试routingkey=error
4.7第五种消息模型(Routing之订阅模型-Topics) 与Direct模型相比,都是可以根据RoutingKey把消息路由到不同的队列,只不过Topic类型交换机可以让队列在绑定RoutingKey时使用通配符。这种模型RoutingKey一般都是由一个或者多个单词组成,多个单词之间以’’.’’分隔
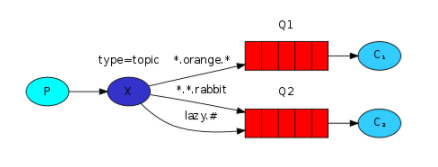
图解:
P:生产者,向交换机发送消息,并指定RoutingKey
X:交换机,类型为topic,接收生产者的消息,然后把消息递交给与RoutingKey匹配的队列
Q1:队列1,只接收routingKey为*.orange. *的消息
Q2:对列2,接收routingKey为*. *.rabbit和lazy.#的消息
C1:消费者1,消费队列中的消息
C2:消费者2
1 2 3 4 5 6 # 通配符 *(星号)可以代替一个单词。 #(哈希)可以替代零个或多个单词。 auto.# 匹配auto.a或者auto.a.b auto.* 只能匹配auto.a 或者auto.b
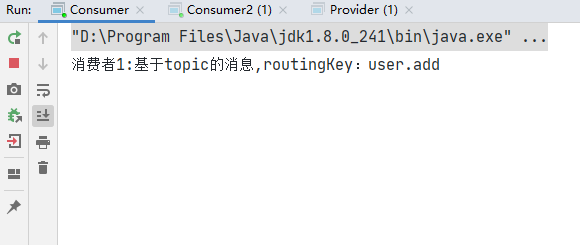
4.7.1生产者 1 2 3 4 channel.exchangeDeclare("log_topic" , "topic" ); String routingKey = "user.add.aa" ; channel.basicPublish("log_topic" , routingKey, null , ("基于topic的消息,routingKey:" + routingKey).getBytes());
4.7.2消费者1 1 2 3 channel.exchangeDeclare("log_topic" , "topic" ); String queue = channel.queueDeclare().getQueue(); channel.queueBind(queue, "log_topic" , "user.*" );
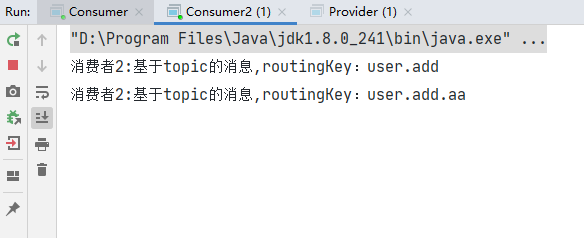
4.7.3消费者2 1 2 3 channel.exchangeDeclare("log_topic" , "topic" ); String queue = channel.queueDeclare().getQueue(); channel.queueBind(queue, "log_topic" , "user.#" );
4.7.4测试user.add和user.add.aa
5.SpringBoot整合RabbitMQ 5.1环境 5.1.1引入依赖 1 2 3 4 <dependency > <groupId > org.springframework.boot</groupId > <artifactId > spring-boot-starter-amqp</artifactId > </dependency >
5.1.2配置文件 1 2 3 4 5 6 7 8 9 spring: application: name: rabbitmq-springboot rabbitmq: host: 192.168 .45 .126 port: 5672 virtual-host: /ems username: ems password: 123
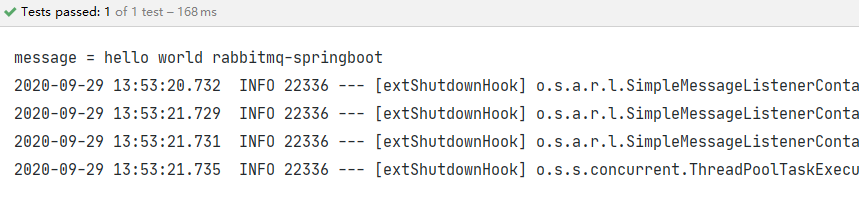
5.2hello world模型使用 1 2 3 4 5 6 7 8 9 @RabbitListener(queuesToDeclare = @Queue(value = "hello",autoDelete = "true")) @Component public class HelloConsumer @RabbitHandler public void test (String message) System.out.println("message = " + message); } }
1 2 3 4 5 6 7 8 9 10 11 12 13 @SpringBootTest class RabbitmqHelloworldApplicationTests @Autowired private RabbitTemplate rabbitTemplate; @Test void contextLoads () rabbitTemplate.convertAndSend("hello" ,"hello world rabbitmq-springboot" ); } }
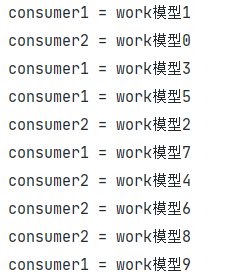
5.3work模型 1 2 3 4 5 6 @Test public void work () for (int i = 0 ; i < 10 ; i++) { rabbitTemplate.convertAndSend("work" , "work模型" + i); } }
1 2 3 4 5 6 7 8 9 10 11 12 13 14 15 @Component public class WorkConsumer @RabbitListener(queuesToDeclare = @Queue("work")) @RabbitHandler public void consumer1 (String message) System.out.println("consumer1 = " + message); } @RabbitListener(queuesToDeclare = @Queue("work")) @RabbitHandler public void consumer2 (String message) System.out.println("consumer2 = " + message); } }
默认是公平分配的,需要能者多劳的话得额外配置
5.4fanout模型 1 2 3 4 @Test void fanout () rabbitTemplate.convertAndSend("fanout_logs" , "" , "fanout模型" ); }
1 2 3 4 5 6 7 8 9 10 11 12 13 14 15 16 17 18 19 20 21 22 23 24 25 26 @Component public class FanoutConsumer @RabbitListener(bindings = @QueueBinding( value = @Queue, //临时队列 exchange = @Exchange(value = "fanout_logs",type = "fanout") // 默认direct )) public void consumer1 (String message) System.out.println("consumer1 = " + message); } @RabbitListener(bindings = @QueueBinding( value = @Queue, //临时队列 exchange = @Exchange(value = "fanout_logs",type = "fanout") )) public void consumer2 (String message) System.out.println("consumer2 = " + message); } @RabbitListener(bindings = @QueueBinding( value = @Queue, //临时队列 exchange = @Exchange(value = "fanout_logs",type = "fanout") )) public void consumer3 (String message) System.out.println("consumer3 = " + message); } }
5.5Direct模型 1 2 3 4 5 @Test void routingKey () String routingKey = "error" ; rabbitTemplate.convertAndSend("routing_logs" , routingKey, routingKey + "信息" ); }
1 2 3 4 5 6 7 8 9 10 11 12 13 14 15 16 17 18 19 20 @Component public class RoutingKey @RabbitListener(bindings = @QueueBinding( value = @Queue, exchange = @Exchange(value = "routing_logs"), key = "info" )) public void consumer1 (String message) System.out.println("consumer1 = " + message); } @RabbitListener(bindings = @QueueBinding( value = @Queue, exchange = @Exchange("routing_logs"), //默认交换机类型为direct,所以无需设置 key = {"error","warning","info"} )) public void consumer2 (String message) System.out.println("consumer2 = " + message); } }
5.6Topics模型 1 2 3 4 5 @Test void topics () String routingKey = "user.save.a" ; rabbitTemplate.convertAndSend("topics_logs" , routingKey, routingKey + "信息" ); }
1 2 3 4 5 6 7 8 9 10 11 12 13 14 15 16 17 18 19 20 21 22 @Component public class TopicsConsumer @RabbitListener(bindings = @QueueBinding( value = @Queue, exchange = @Exchange(value = "topics_logs",type = "topic"), key = {"user.*"} )) public void consumer1 (String message) System.out.println("consumer1 = " + message); } @RabbitListener(bindings = @QueueBinding( value = @Queue, exchange = @Exchange(value = "topics_logs",type = "topic"), key = {"user.#"} )) public void consumer2 (String message) System.out.println("consumer2 = " + message); } }
1 @RabbitListener 标注在方法上时可以不用加@RabbitHandler 注解
消息手动确认
1 2 3 4 5 6 7 8 listener: direct: acknowledge-mode: manual simple: acknowledge-mode: manual concurrency: 1
1 2 3 4 5 6 7 8 @SneakyThrows @RabbitListener(queuesToDeclare = @Queue("work")) public void consumer1 (String content, Message message, Channel channel) System.out.println("content = " + content); channel.basicAck(message.getMessageProperties().getDeliveryTag(),false ); }
6.应用场景 异步处理
应用解耦
流量削峰
7.RabbitMQ集群 7.1集群架构 7.1.1副本集群